Custom Field Components
Using the custom field, you can extend the look and feel of your forms and add powerful logic with JavaScript, HTML, and CSS.
The custom field has internal methods to facilitate passing data to the form, adding frontend and backend validations, and handling common events such as focus or blur.
You can use custom field to create:
Fields with a custom data structure.
Example: Objects, array of strings
Fields that use third-party widgets.
Example: Google Address autocomplete
Fields with logic to hide or show other fields.
Fields that require external APIs to get a value.
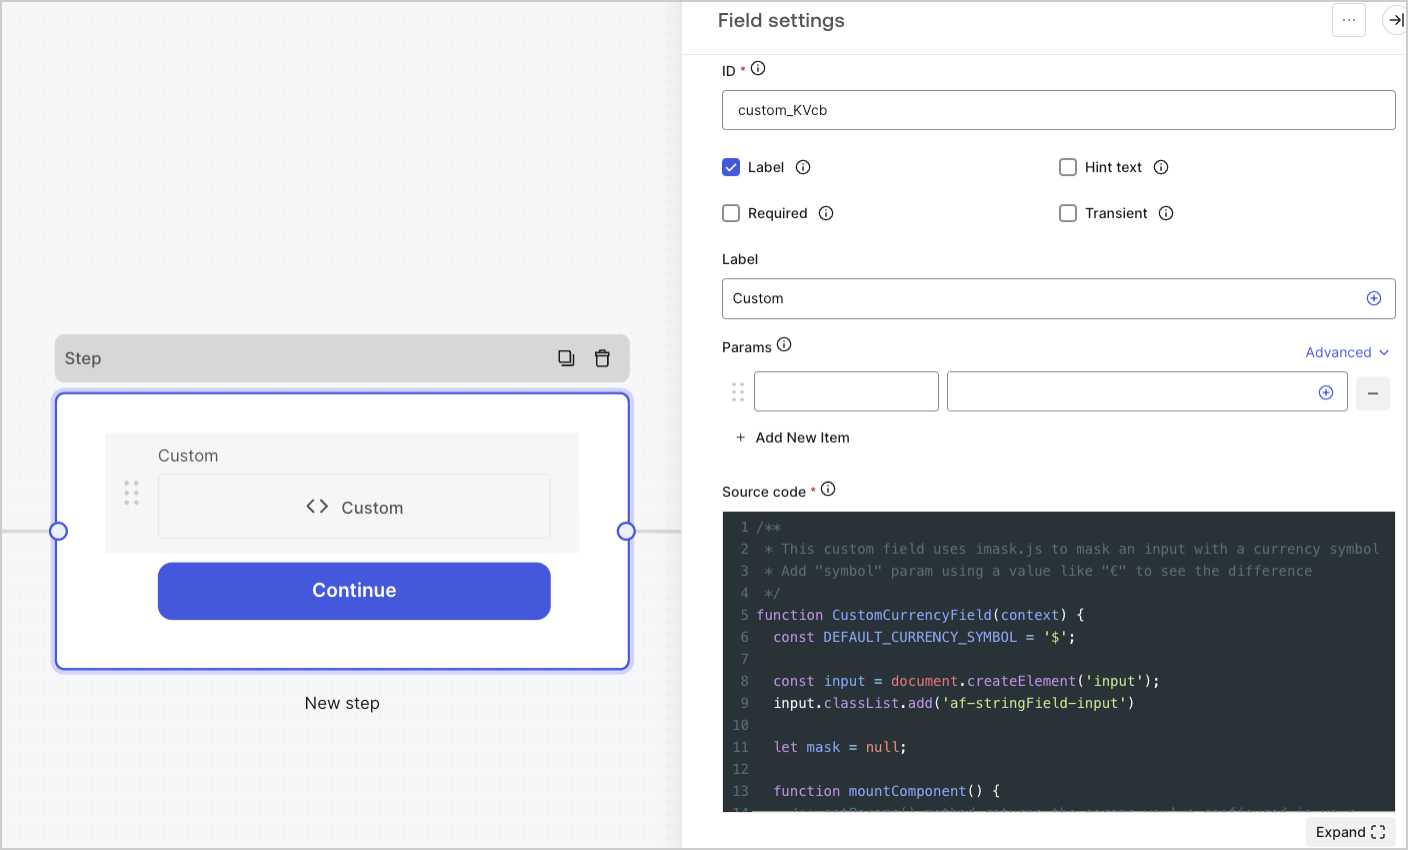
Custom field settings
The custom field settings are:
Params
Add key-value pairs to reference in the custom field source code. Key-value pairs can include form field variables.
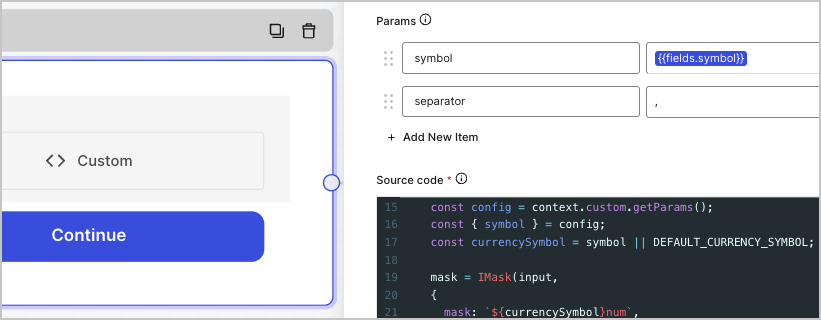
Example:
In the example below, the custom field param settings are populated with the key-value pairs symbol={{fields.symbol}} and separator=,
function CustomComponent(context) {
const input = document.createElement('input');
let mask = null;
function mountComponent() {
/** getParams() method returns the params you've configured in your input */
const config = context.custom.getParams();
const { symbol, separator } = config;
mask = IMask(input,
{
mask: `${symbol}num`,
blocks: {
num: {
mask: Number,
thousandsSeparator: separator,
}
}
});
}
return {
/** Invoked once when the field is created */
init() {
mountComponent();
return input;
},
...
};
}Was this helpful?
Source code
Add your Javascript code to the custom field.
Example:
function customInput() {
const input = document.createElement('input');
input.type = 'text';
return {
init() {
return input;
},
block() {
input.disabled = true;
},
unblock() {
input.disabled = false;
},
getValue() {
return input.value;
}
};
}Was this helpful?
JSON Schema
By default, the custom field accepts any value format. However, you can use JSON Schema to validate values.
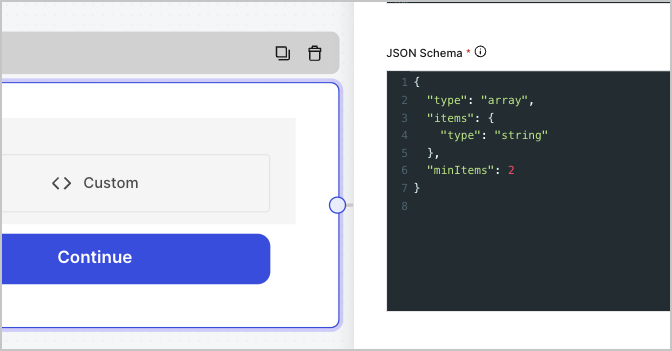
Example:
{
"type": "array",
"items": {
"type": "string"
},
"minItems": 2
}Was this helpful?
To accommodate complex validation requirements, you can use a flow.
CSS
Add your CSS styles to the custom field.
Custom field handlers
You can use these handlers to add custom behavior to the field:
init(params?)
Invoked once when the field is created and passes the params values that you configure in the Params settings.
Returns an HTML element, string, or no value.
| Parameter | Description |
|---|---|
params |
Optional object. Parameters from the custom field settings. |
Example:
const input = document.createElement('input');
input.type = 'text';
init() {
return input;
}Was this helpful?
update(params?)
Invoked when the user visits the same form step again.
This option is useful when you need to re-render UI logic or refresh params values that may have changed.
| Parameter | Description |
|---|---|
params |
Optional object. Parameters from the custom field settings. |
onFocus()
Invoked when focus enters the custom field HTML element.
onBlur()
Invoked when focus abandons the custom field HTML element.
validate(value?)
Invoked when the field value needs to be checked for validity. This is typically executed when the user submits the form step.
Returns
string | true(required)stringif you want to display a custom error messagetrueif you want to pass the client-side validation
| Parameter | Description |
|---|---|
value |
Optional {any} . The current field value. |
Example:
validate(value) {
if (value !== 'Auth0') {
return "Sorry, but you didn't select Auth0";
}
return true;
}Was this helpful?
getValue()
Invoked when the form needs to get the custom field value one or more times. This is typically executed when the user submits the form step.
block()
Invoked when the custom field must be blocked. This is typically executed when the user submits the form step, and data is being processed to our backend.
unblock()
Invoked when the custom field must be unblocked. This is typically executed after the user submits the form step or the data has stopped being processed to our back-end due to a validation error.
getScripts()
Returns a list of URLs the form guarantees will have finished loading before the init() method is invoked.
Example:
getScripts() {
return ['https://example.com/script_a.js', 'https://example.com/script_b.js'];
}Was this helpful?
Context object
When passing a context object, you can use these methods to handle logic on your form and components.
Custom methods
context.custom.getValue()
Receives the value of the current custom field.
context.custom.setValue()
Sets a value to the current custom field.
Example:
function customInput(context) {
const input = document.createElement('input');
input.type = 'text';
input.addEventListener('change', () => {
context.custom.setValue(input.value);
});
return {
init() {
return input;
},
};
}Was this helpful?
context.custom.createUid()
Returns a unique identifier for the current custom field.
Example:
function customInput(context) {
const input = document.createElement('input');
input.type = 'text';
input.id = context.custom.createUid();
return {
init() {
return input;
},
getValue() {
return input.value;
}
};
}Was this helpful?
context.custom.getParams()
Receives the parameters from the current custom field settings.
Example:
function customInput(context) {
// Accessing parameters on the root of the function does NOT work
// const { defaultValue } = context.custom.getParams();
// console.log(defaultValue); // undefined
function buildInput() {
const { defaultValue } = context.custom.getParams();
const input = document.createElement('input');
input.type = 'text';
input.value = defaultValue;
return input;
}
return {
init() {
return buildInput();
},
getValue() {
return input.value;
}
};
}Was this helpful?
Form methods
When you need to interact with the form to gather values from other fields or navigate to other form steps, you can use the following form methods:
context.form.getId()
Returns a unique identifier for the current form.
context.form.getRoot()
Returns the root HTML element for the current form.
context.form.goForward()
Goes to the next form step.
context.form.goPrevious()
Goes to the previous form step.
context.form.isValid()
Returns a boolean if the form passes all the client-side validations.
context.form.validate()
Evaluates existing field values using client-side validation before continuing. If a field does not pass the validation, an error message will appear.
context.form.getAllHiddenFields()
Returns an object with all hidden field values.
context.form.setHiddenField(id, value)
Sets a hidden field value.
| Parameter | Description |
|---|---|
id |
String. The ID of the hidden field. |
value |
String. The value of the hidden field. |
context.form.getValues()
Returns an object with all field and hidden field values.
context.form.getField(id)
Returns an instance for the specified field.
getNode() | trueReturns the root HTML element of the field.getValue()Returns the field value.setRequired(boolean)Sets or unsets the field as required.
| Parameter | Description |
|---|---|
id |
String . The ID field value. |
Example:
const fullName = context.form.getField('full_name');
const fullNameValue = fullName.getValue();
console.log(fullNameValue); // John DoeWas this helpful?
Custom field examples
The sections below provide example custom fields you can add to your forms:
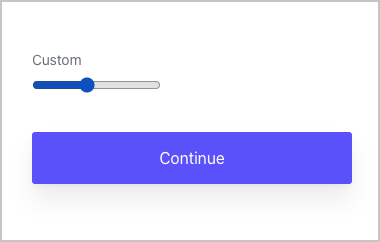
Range input custom field
A custom field that returns a value from a predetermined range.
Source code:
function rangeInput() {
const input = document.createElement('input');
input.type = 'range';
input.min= '0';
input.max= '100';
input.value = '0';
return {
init() {
return input;
},
getValue() {
return input.value;
}
};
}Was this helpful?
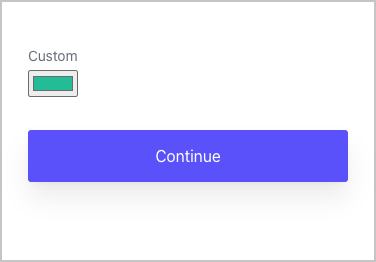
Color input custom field
A custom field that returns a color hex value.
Source code:
function colorInput() {
const input = document.createElement('input');
input.type = 'color';
input.value = '#20c5a0';
return {
init() {
return input;
},
getValue() {
return input.value;
},
};
}Was this helpful?
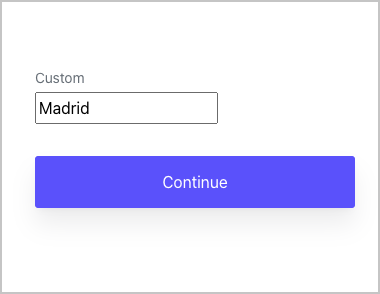
Autocomplete input custom field using values from API
A custom field that returns an autocomplete value using a third-party API.
Source code:
function textInputWithAutocomplete(context) {
const input = document.createElement('input');
input.type = 'text';
function populateInputValue(json) {
const { city } = json;
input.value = city;
}
function fetchIpInfo() {
const url = 'https://ipinfo.io/json';
fetch(url)
.then((res) => res.json())
.then((json) => populateInputValue(json));
}
return {
init() {
fetchIpInfo();
return input;
},
getValue() {
return input.value;
},
};
}Was this helpful?
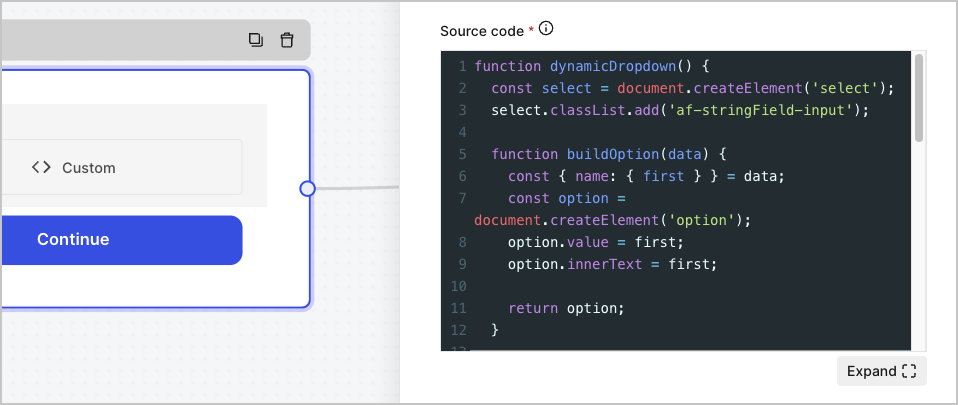
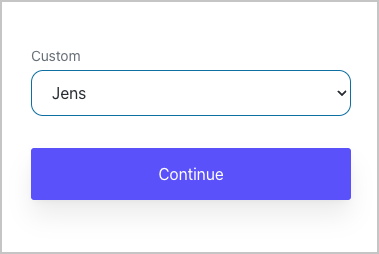
Dynamic dropdown custom field using values from API
A custom field that returns a value from a dynamic dropdown list using a third-party API.
Source code:
function dynamicDropdown() {
const select = document.createElement('select');
select.classList.add('af-stringField-input');
function buildOption(data) {
const { name: { first } } = data;
const option = document.createElement('option');
option.value = first;
option.innerText = first;
return option;
}
function populateNames(json) {
const { results } = json;
results.forEach((o) => {
const option = buildOption(o);
select.appendChild(option);
});
}
function fetchNames() {
const url = 'https://randomuser.me/api/?results=10&inc=name';
fetch(url)
.then((res) => res.json())
.then((json) => populateNames(json));
}
return {
init() {
fetchNames();
return select;
},
getValue() {
return select.value;
},
};
}Was this helpful?
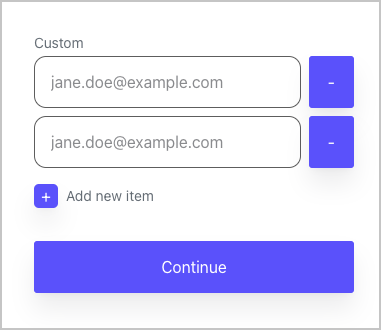
Dynamic input custom field with a (+) button to add more fields
A custom field that allows users to add more fields.
Source code:
function DynamicInputs(context) {
const DEFAULT_INITIAL_INPUTS = 2;
const DEFAULT_PLACEHOLDER = 'jane.doe@example.com';
const DEFAULT_ADD_BUTTON_TEXT = 'Add new item';
const DEFAULT_INPUT_TYPE = 'email';
const STATE_VALUE = {};
const FIELD_ID = context.custom.createUid();
let UUID_COUNTER = 0;
let INPUTS_COUNTER = 0;
const container = document.createElement('div');
const inputsContainer = document.createElement('div');
container.appendChild(inputsContainer);
function buildAddNewItem() {
const config = context.custom.getParams();
const { add_button_text } = config;
const ADD_BUTTON_TEXT = add_button_text || DEFAULT_ADD_BUTTON_TEXT;
const addInputButton = document.createElement('button');
addInputButton.type = 'button';
addInputButton.classList.add('af-dynamic-input-add-button');
addInputButton.id = `${FIELD_ID}_add-input-button`;
addInputButton.onclick = buildInputContainer.bind(this);
const addInputButtonIcon = document.createElement('span');
addInputButtonIcon.classList.add('af-button', 'af-dynamic-input-add-button-icon');
addInputButtonIcon.innerText = '+';
const addInputButtonText = document.createElement('span');
addInputButtonText.classList.add('af-dynamic-input-add-button-text');
addInputButtonText.innerText = ADD_BUTTON_TEXT;
addInputButton.appendChild(addInputButtonIcon);
addInputButton.appendChild(addInputButtonText);
container.appendChild(addInputButton);
}
function removeInput(container, input) {
delete STATE_VALUE[input.name];
container.remove();
}
function buildRemoveInputButton(container, input) {
const button = document.createElement('button');
button.type = 'button';
button.classList.add('af-button', 'af-dynamic-input-remove-button');
button.innerText = '-';
button.onclick = removeInput.bind(this, container, input);
INPUTS_COUNTER--;
return button;
}
function buildInput() {
const config = context.custom.getParams();
const { placeholder, input_type } = config;
const PLACEHOLDER = placeholder || DEFAULT_PLACEHOLDER;
const INPUT_TYPE = input_type || DEFAULT_INPUT_TYPE;
const input = document.createElement('input');
input.type = INPUT_TYPE;
input.placeholder = PLACEHOLDER;
input.classList.add('af-stringField-input');
input.name = `${FIELD_ID}_${UUID_COUNTER}`;
input.id = input.name;
input.addEventListener('change', () => {
STATE_VALUE[input.name] = input.value;
});
UUID_COUNTER++;
return input;
}
function buildInputContainer() {
const container = document.createElement('div');
container.classList.add('af-dynamic-input-container');
const input = buildInput();
container.appendChild(input);
const removeButton = buildRemoveInputButton(container, input);
container.appendChild(removeButton);
inputsContainer.appendChild(container);
INPUTS_COUNTER++;
}
function initComponent() {
const config = context.custom.getParams();
const { initial_inputs } = config;
const INITIAL_INPUTS = initial_inputs || DEFAULT_INITIAL_INPUTS;
INPUTS_COUNTER = INITIAL_INPUTS
for (let i = 0; i < INITIAL_INPUTS; i++) {
buildInputContainer();
}
}
function blockFields(value) {
const inputKeys = Object.keys(STATE_VALUE);
inputKeys.forEach((o) => {
const selector = document.getElementById(o);
selector.disabled = value;
});
}
return {
init() {
buildAddNewItem();
initComponent();
return container;
},
block() {
blockFields(true);
},
unblock() {
blockFields(false);
},
getValue() {
return Object.values(STATE_VALUE);
},
};
}Was this helpful?
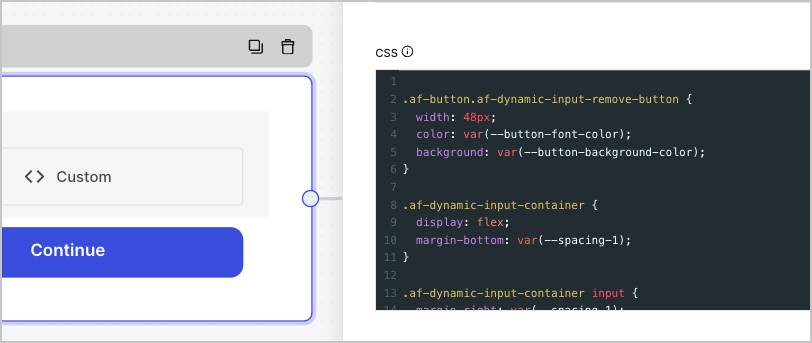
CSS code:
.af-button.af-dynamic-input-remove-button {
width: 48px;
color: var(--button-font-color);
background: var(--button-background-color);
}
.af-dynamic-input-container {
display: flex;
margin-bottom: var(--spacing-1);
}
.af-dynamic-input-container input {
margin-right: var(--spacing-1);
}
button.af-dynamic-input-add-button {
background: none;
border: none;
padding: 0;
margin: 0;
margin-top: var(--spacing-1);
display: inline-flex;
cursor: pointer;
align-items: center;
}
.af-button.af-dynamic-input-add-button-icon {
background: var(--primary-color);
width: 24px;
padding: 0;
height: 24px;
border-radius: .3em;
display: flex;
justify-content: center;
align-items: center;
color: #fff;
margin-right: var(--spacing-1);
}
.af-dynamic-input-add-button-text {
color: var(--label-font-color);
font-size: var(--label-font-size);
}
.af-dynamic-input-add-button:focus {
outline: none;
}
.af-dynamic-input-add-button:hover .af-button {
transition: filter var(--transition-normal), box-shadow var(--transition-normal);
filter: brightness(1.1);
box-shadow: 0 0 0 var(--outline-width) var(--outline-color), 0px 4px 8px -4px var(--shadow-color), 0px 16px 24px var(--shadow-color);
}
.af-dynamic-input-add-button:focus .af-button {
box-shadow: 0 0 0 var(--outline-width) var(--outline-color), 0px 4px 8px -4px var(--shadow-color), 0px 16px 24px var(--shadow-color);
}Was this helpful?